28Oct
以前動画でお見せしたように、多くのバズベイトは新品状態ではあまりスクイーク音が出ません。
そこでどのようにチューニングすれば良いのか、私なりの方法をご紹介します。
(ただしやり方や良い音の基準は千差万別ですので、皆様の意見もぜひお聞かせください!)
As I showed in the last video, most buzzbaits don’t squeak much when new.
Here’s my way to tune them for more squeak.
Everyone has their own style, so I’d love to hear your tips too!
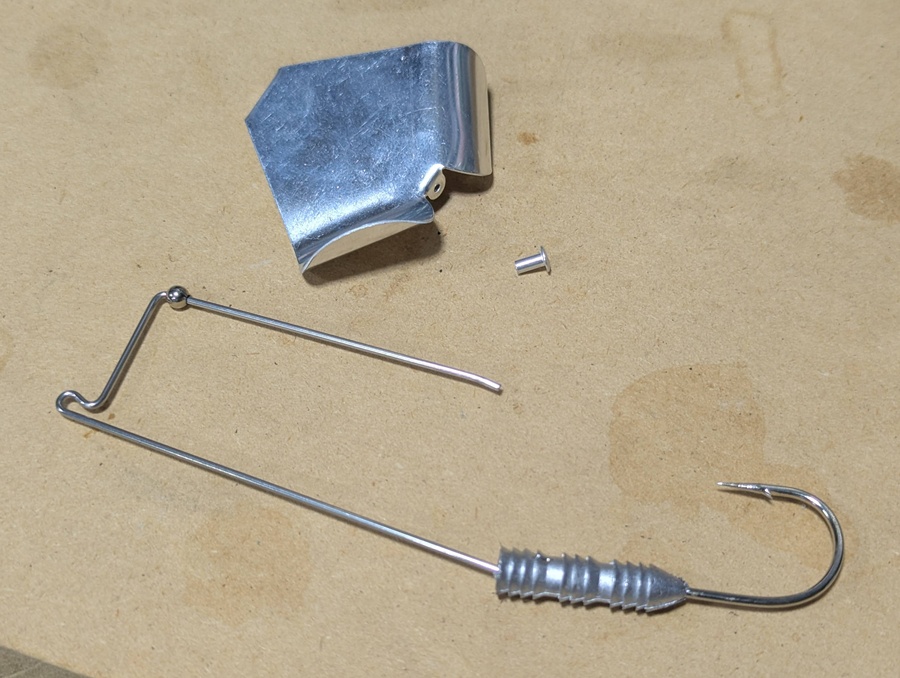
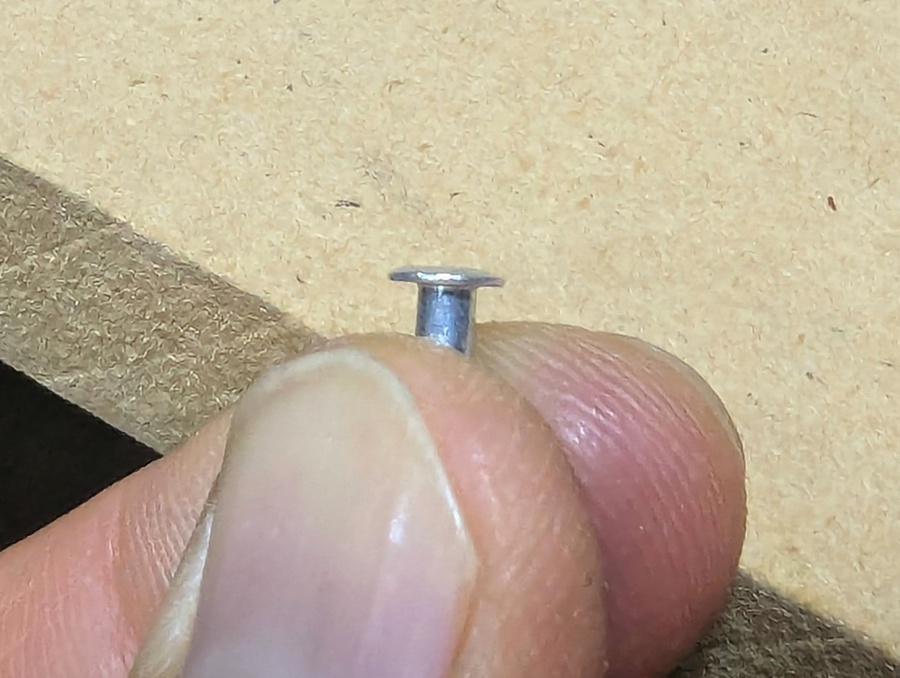
まずは作業をやりやすくするため、ワイヤーの端を曲げ戻し、ペラとリベットを抜き取ります。
First, I straighten the wire end to make the work easier, then remove the blade and rivet.
次に、ペラの先端を少し開いて斜めにします。
これはシャフトとの接触点を増やし、この部分からも擦れ音が出るのを期待するためです。
あまり曲げすぎるとペラが回らなくなるので注意しましょう。
Next, I slightly open the tip of the blade and angle it.
This increases the contact point with the shaft to create more squeak.
Be careful not to bend it too much, or it won’t spin.
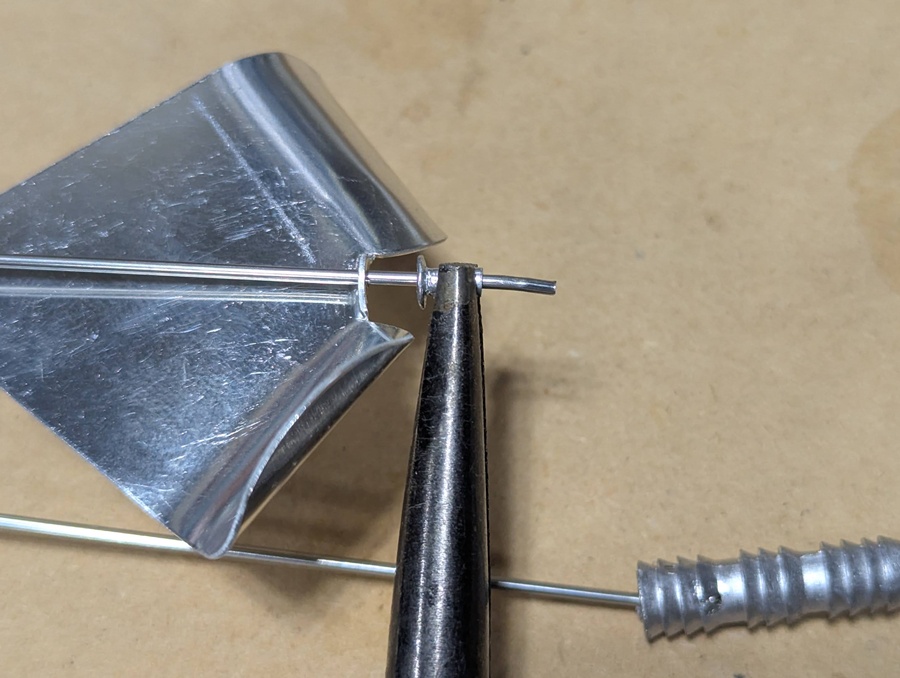
それから、リベットをラジオペンチで挟んで固定します。
リベットがペラと一緒に回ってしまうと、こすれ合う音が出ないからです。
この時、リベットの平らな面がシャフトに対して垂直になっている事を確認しましょう。
Then, I hold the rivet with pliers to keep it from spinning with the blade.
If it spins, you won’t get that squeaking sound.
Make sure the flat side of the rivet is vertical to the shaft.
またカシメただけでは微妙に動いてしまうので、後ろ側から瞬間接着剤を流して固定しています。
(もっと良い方法をご存知の方は教えて下さい)
ここまでがごく基本的なチューニング法になるかと思います。
Just crimping isn’t enough — the rivet can still move a little.
So I add a drop of super glue from the back to lock it in.
If you know a better way, let me know!

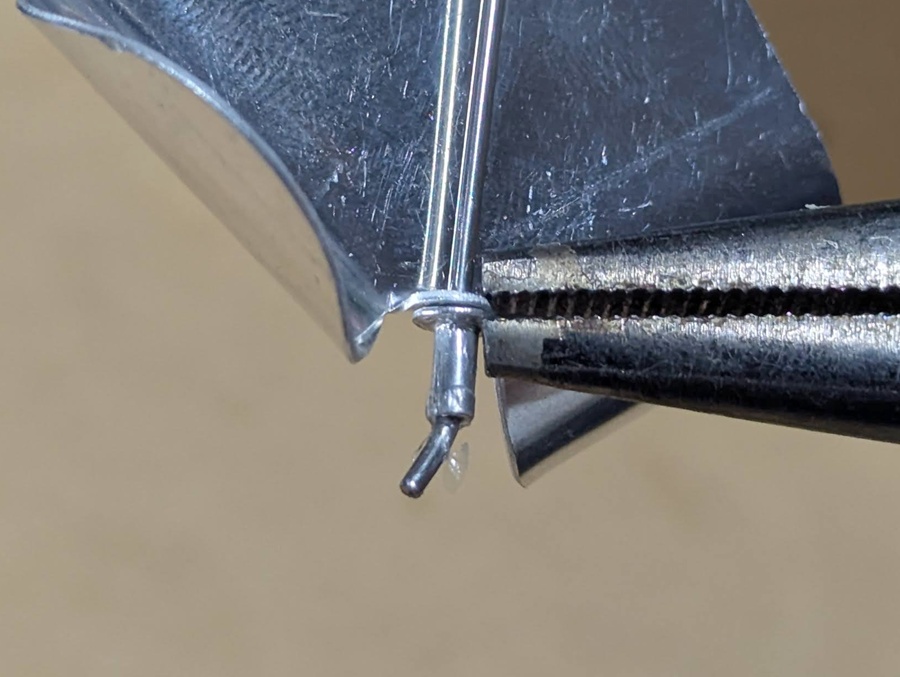
さらにスクイーク音を大きくするために、リベットとペラの接触面積を広げます。
まずはペラの後ろの接触部分が、シャフトに対して垂直になるように微調整。
そしてリベットとペラが密着するよう、全周に渡って両者をペンチで挟んで隙間を無くします。
To make it squeak even more, I increase the contact area between the rivet and blade.
First, I adjust the back of the blade so it’s vertical to the shaft.
Then, I squeeze the rivet and blade all the way around with pliers to remove any gap.
これはリベットの頭が微妙に丸くなっているからで、この端っこを起こして頭を真っ平にするというイメージです。
かなり微妙な作業ですので、先の細い精度の良いラジオペンチを使うと良いでしょう。
This is because the rivet head is slightly rounded.
I bend up the edge to make the head perfectly flat.
It’s a delicate job, so use a fine-tip pair of pliers for better control.
※注:ただしこれには異論もあって、例えば元エリートプロの松下選手は逆にペラの接触部分を鋭角に曲げるそうです。
接触部分を点にする事で、逆に接点に掛かる圧力が増すのかもしれまれん。
Note: There are different opinions on this.
For example, former Elite pro Matsushita bends the contact point sharper instead.
By making it a single point, the pressure on the contact may actually increase.
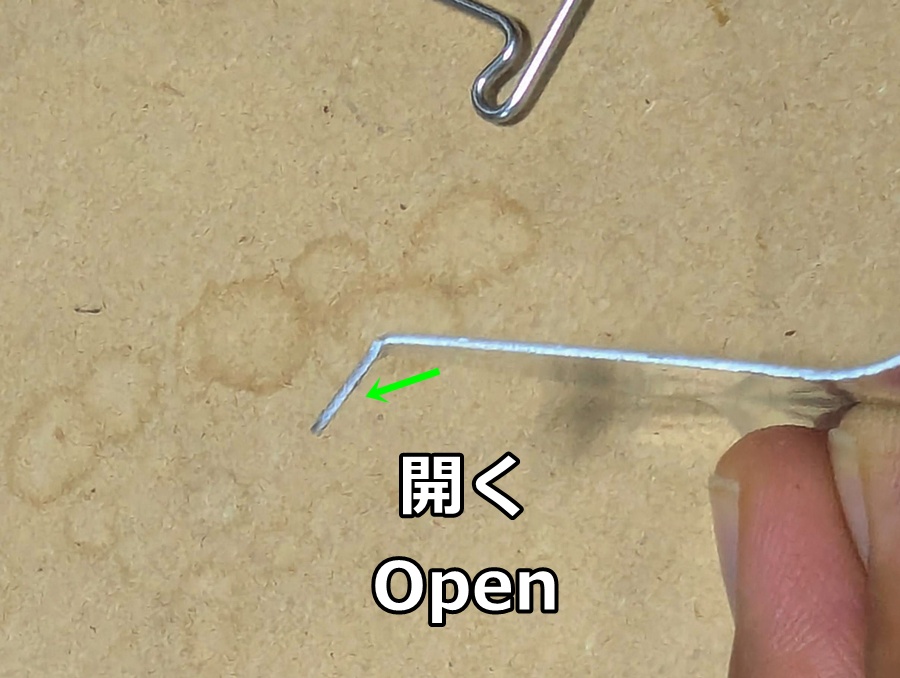
最後にシャフトの端を曲げ戻して終了。
この時リベット部分まで曲がってしまわないよう注意が必要で、あまり大きく曲げ戻す必要は無いと思います。
仕上げにブロワーかドライヤーで数分回してやると、アタリがついてスクイーク音が大きくなってきますよ!
Finally, bend the shaft end back to finish.
Be careful not to bend the rivet part — it doesn’t need much.
For the final touch, spin it for a few minutes with a blower or hair dryer.
※ぜひFacebookページへのいいね!& twitter・Instagramのフォローをよろしくお願いします。
関連記事
-
[D] 「当てて喰わせる」シャロークランク – アスカ60SRの出し所とは?
2015.05.07
-

[D] ちょっとマニアックな、ワームの素材と温度の関係
2016.09.06
-

:[D] デスアダースティックが”ただの棒”ではない理由
2017.06.01
-

[D] D-Billシャッドはクランクでした
2016.07.31
コメント
この記事へのトラックバックはありません。

この記事へのコメントはありません。