16Sep
今回は、ボートのハンドルの外し方を図解していきます。
例はトライトンの21TRXですが、まずハンドルを留めている6か所のビスを外します。
さらに真ん中のエンブレムを外すと、中のシャフトが見えてきます。
Here’s a guide on how to remove a boat’s steering wheel.
The example shown is a 2020 Triton 21TRX.
First, remove the six screws holding the wheel in place.
Next, take off the center emblem to reveal the shaft.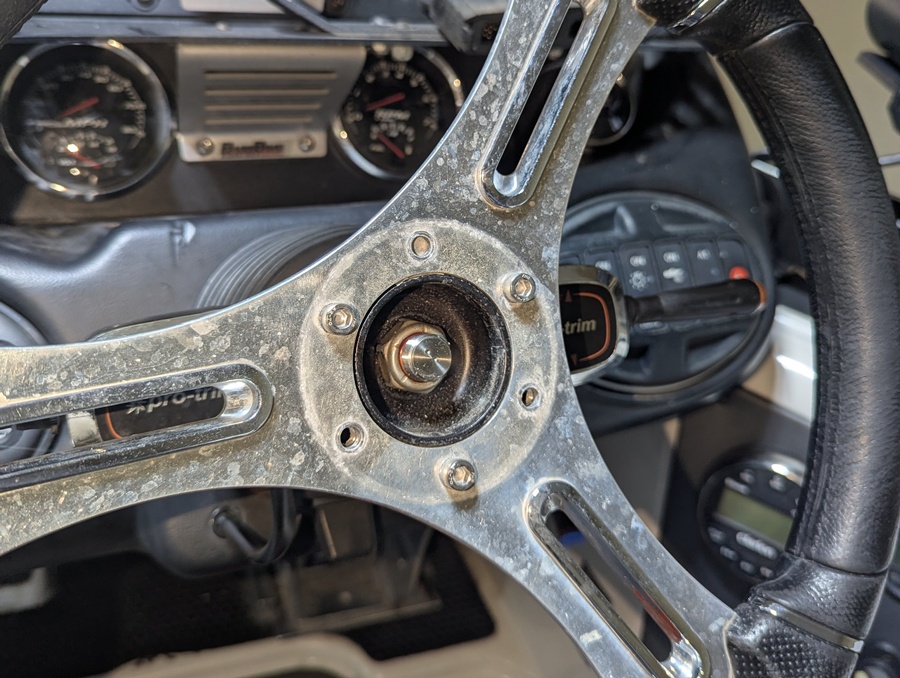
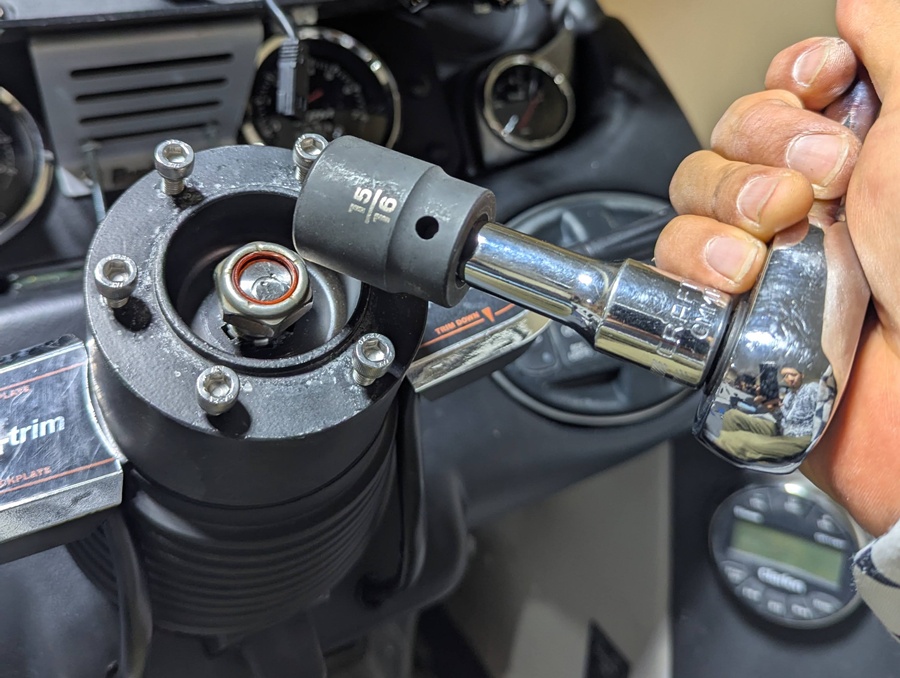
次にシャフトのナットを外します。
15/16″という少し特殊なサイズでした。
Next, remove the nut on the shaft. It was 15/16″
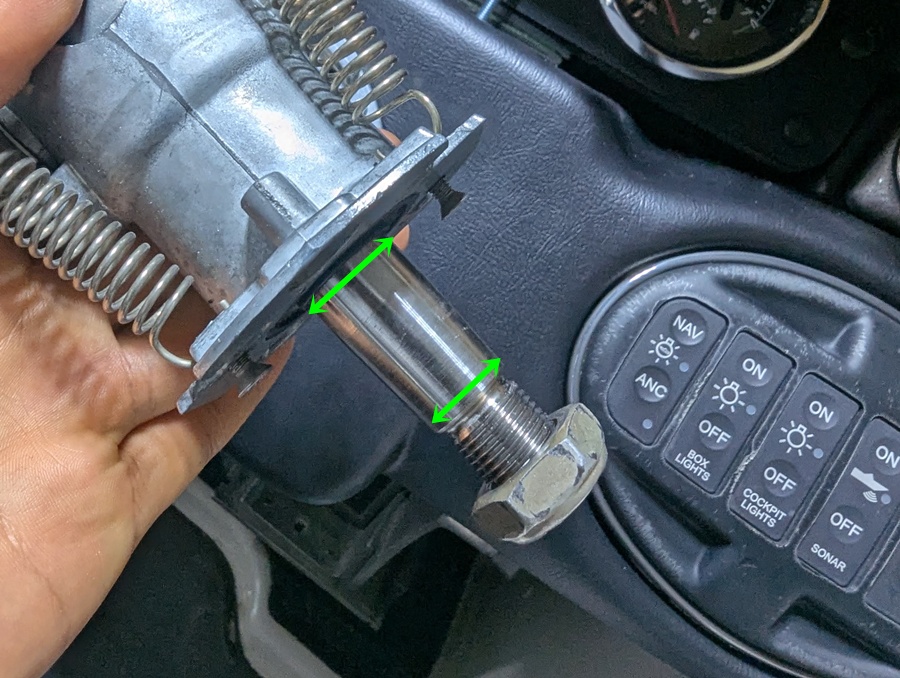
次にステアリングのアダプタ(黒い筒状のパーツ)を引き抜きます。
しかしシャフトにテーパーが付いているので、固くはまり込んでなかなか抜けません。
ステアリングホイールを付け直して手前に引っぱりながら、シャフトをハンマーで叩くと良いようです。
Next, pull off the steering adapter (the black cylindrical part). However, because the shaft is tapered, it fits tightly and is difficult to remove. It’s a good idea to put the steering wheel back on and pull forward while tapping the shaft with a hammer.
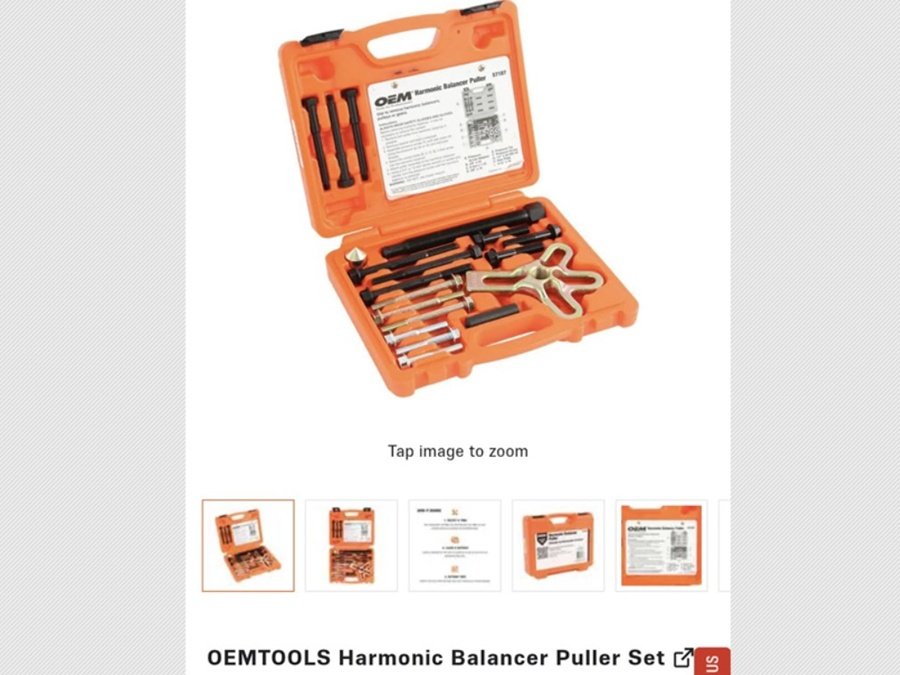
ところがそれでも抜けなかったので、”プラー”という工具を使いました。
下手にハンマーで叩き過ぎるとシャフトの溝を痛めてしまったりするらしいので、最初から専用工具を使った方が良いかもしれません。
Since that didn’t work, I used a tool called a “puller.”
Apparently, hitting it too much with a hammer can damage the grooves on the shaft, so it might be better to just use the right tool for the job from the start.
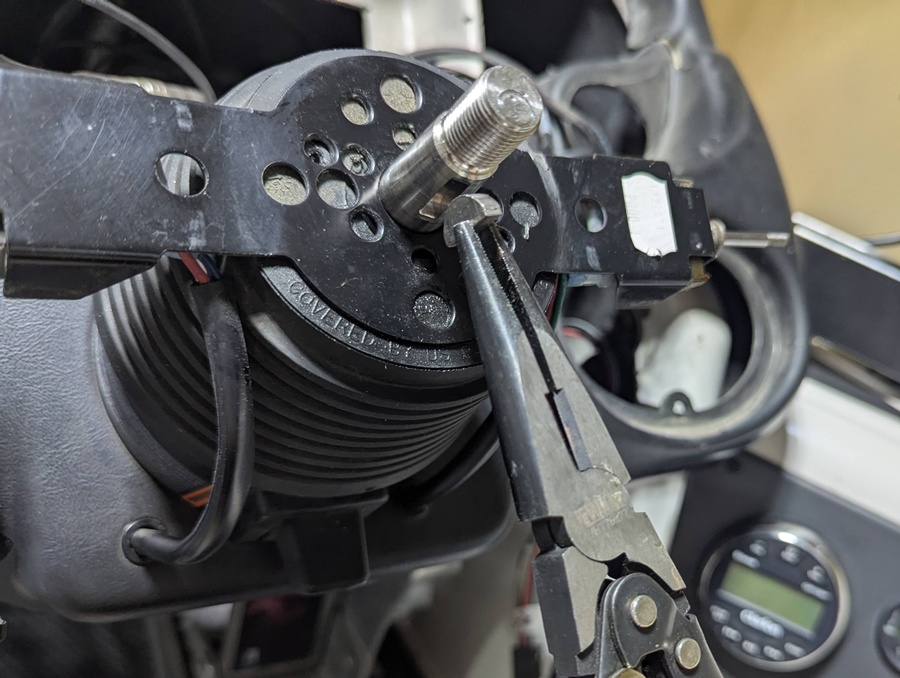
ステアリングホイールを留めていたビス穴にプラーを固定するのですが、長さが足りなかったためにサイズの合うネジとワッシャーを探して来て固定しました。
To secure the puller to the screw holes where the steering wheel was attached, I had to find some appropriately sized screws and washers because the ones I had weren’t long enough.
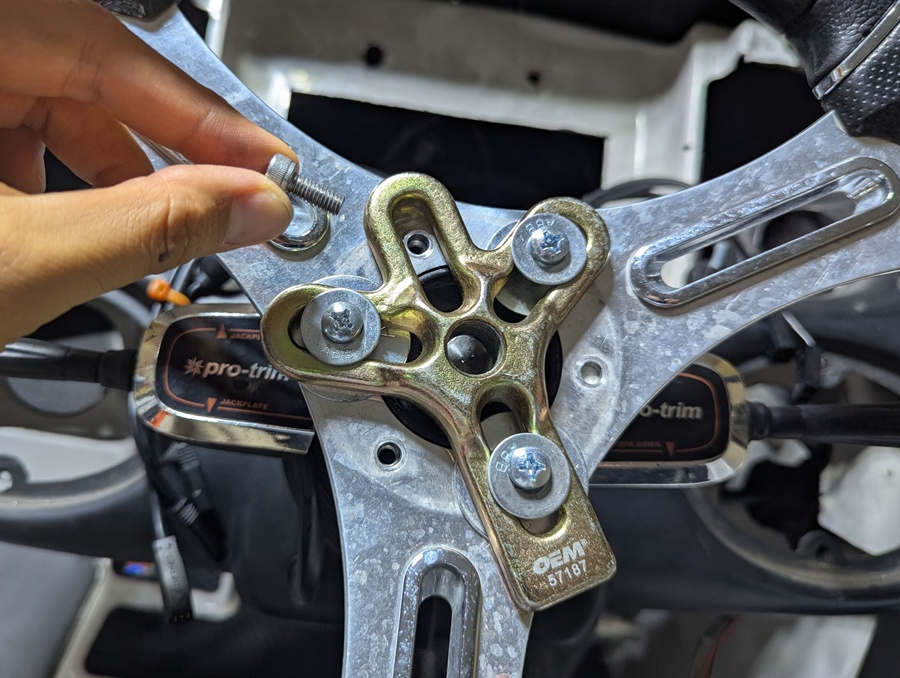
固定したら真ん中にシャフトを通してねじ込んでいきます。
Once you’ve secured it, you thread the center shaft through and screw it in.
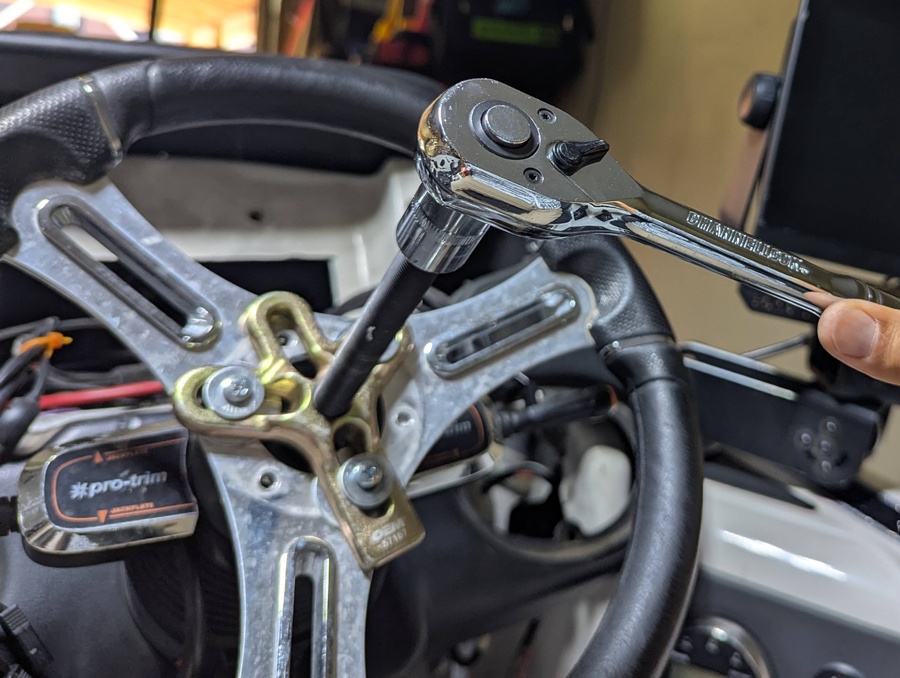
あれだけ固かったアダプタが簡単に外れました。
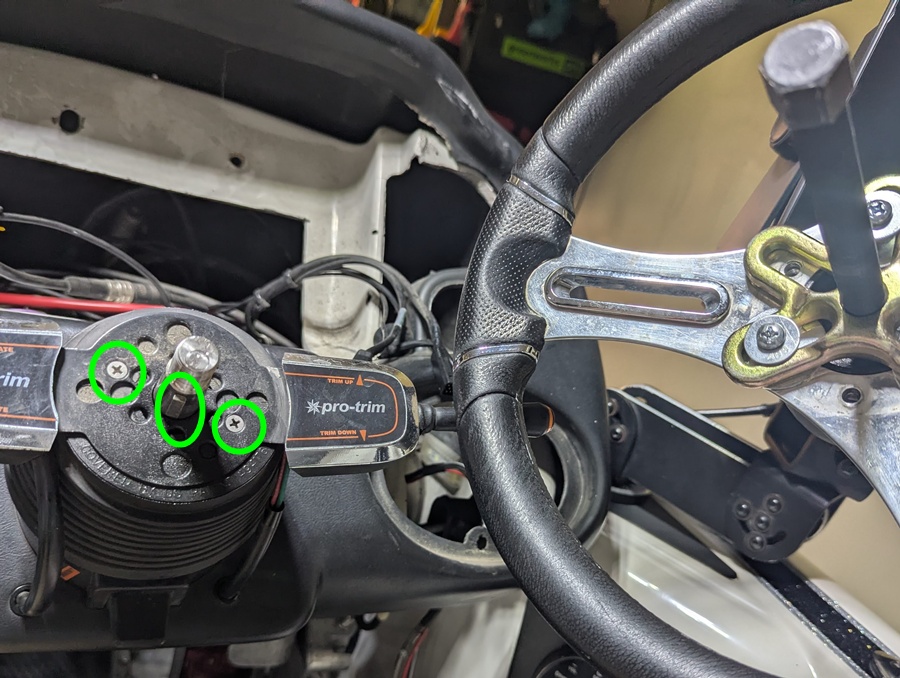
次はトリムのスイッチを外していきます。
The adapter, which had been so stubborn, came off easily.
Next, you’ll remove the trim switch.
シャフトに着いた半円状のキーを外しておくのも忘れずに。
Don’t forget to also remove the semicircular key on the shaft.
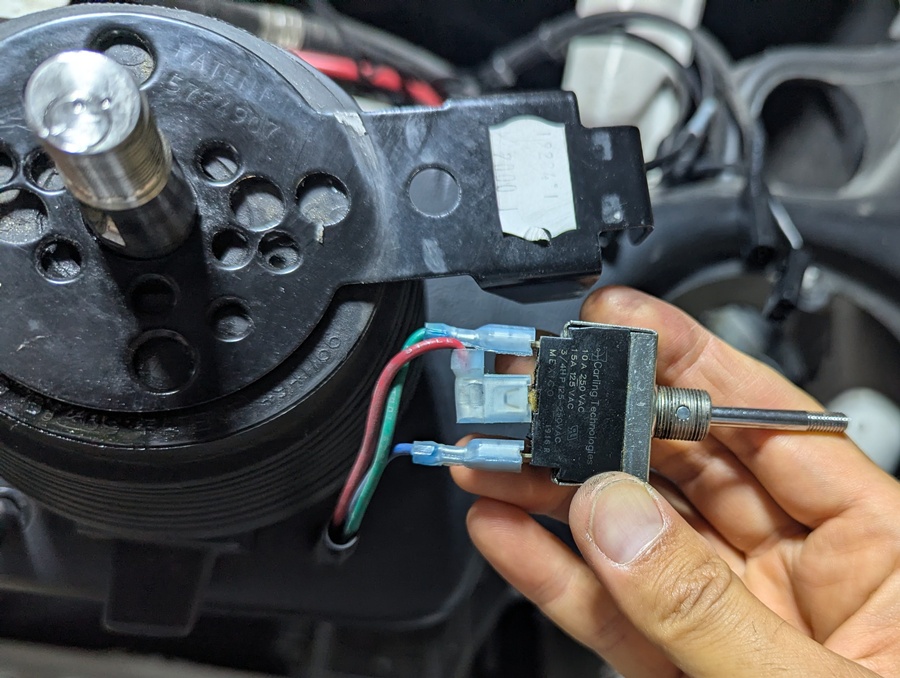
ちなみにトリムとジャックのスイッチは、軸をひねると抜けます。
カバーやスイッチ本体はリングで留まっているので、これも外して抜きましょう。
By the way, the trim and jackplate switches can be removed by twisting the shaft. The cover and the switch body are held in place by a ring, so remove that and pull them out as well.

次はスイッチの配線カプラーを引き抜きます。
どの色の線がどこに繋がっていたかを忘れずに。
Next, pull out the wiring coupler for the switches.
Be sure to remember which color wire was connected where.
次はゴム製のカバーを外します。
Next, remove the rubber cover.
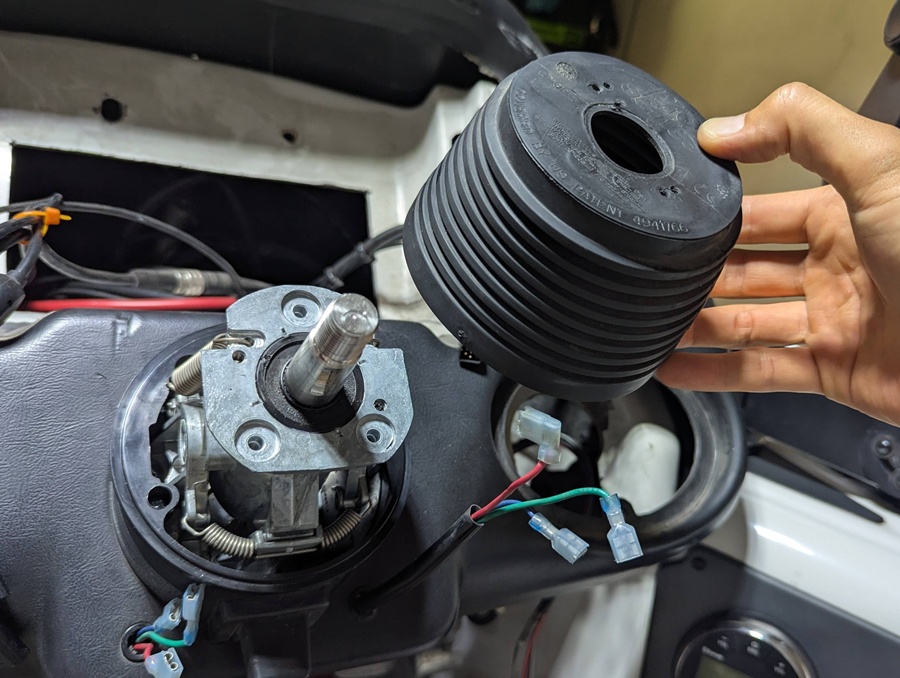
左右二か所のビスを取って、プラスチックのカバーも外します。
ステアリングのチルトのゴムも、この時一緒に外れます。
そうしたら、さらに左右二か所のビスを外してシャフトを外しに行きます。
Remove the two screws on the left and right, and take off the plastic cover.
The rubber piece for the steering tilt will come off with it at this point.
Then, remove the two screws on the left and right to take out the shaft.
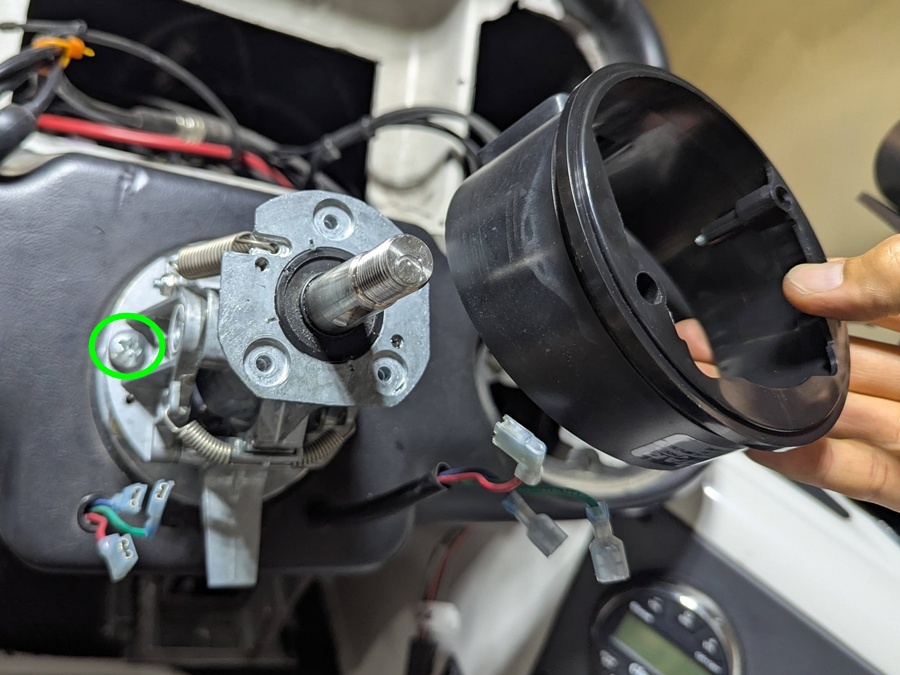
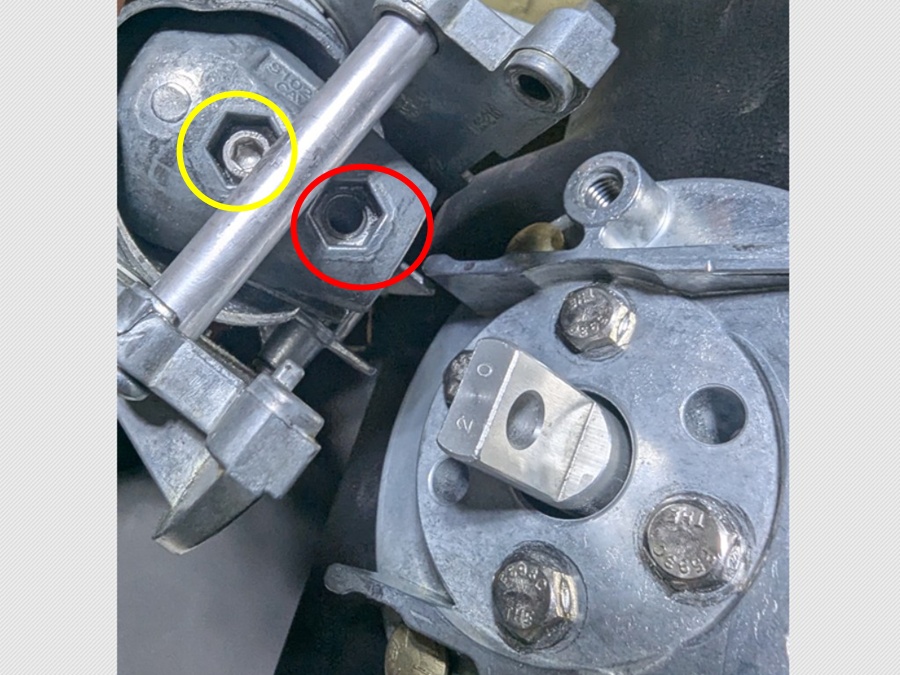
下のシャフトから外す際は、まず黄色の丸のビスを緩めます。
さらにその下にある赤丸のビスが下のシャフトに通っているので、引き抜く事で上のシャフトを取り外せます。
To remove the upper shaft from the lower shaft, first loosen the screw in the yellow circle.
Then, the screw in the red circle below it goes through the lower shaft, so by pulling it out, you can remove the upper shaft.
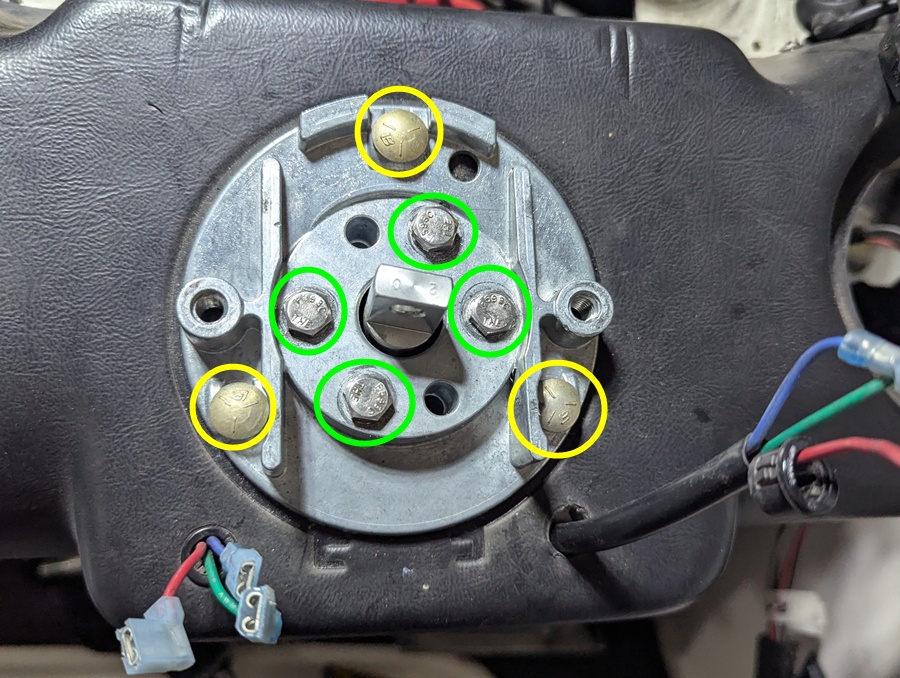
ベースに固定された4本のボルト(緑の丸)を外すと裏側の油圧ユニットが外れます。
重いので、外した後に落とさないよう気を付けましょう。
その後で3か所のボルト・ナット(黄色の丸)を外すと、ようやくベースも外れます。
After you remove the four bolts (in the green circles) that are fastened to the base, the hydraulic unit on the back will come off.
Be careful not to drop it, as it’s heavy.
Then, after you remove the three bolts and nuts (in the yellow circles), the base will finally come off as well.
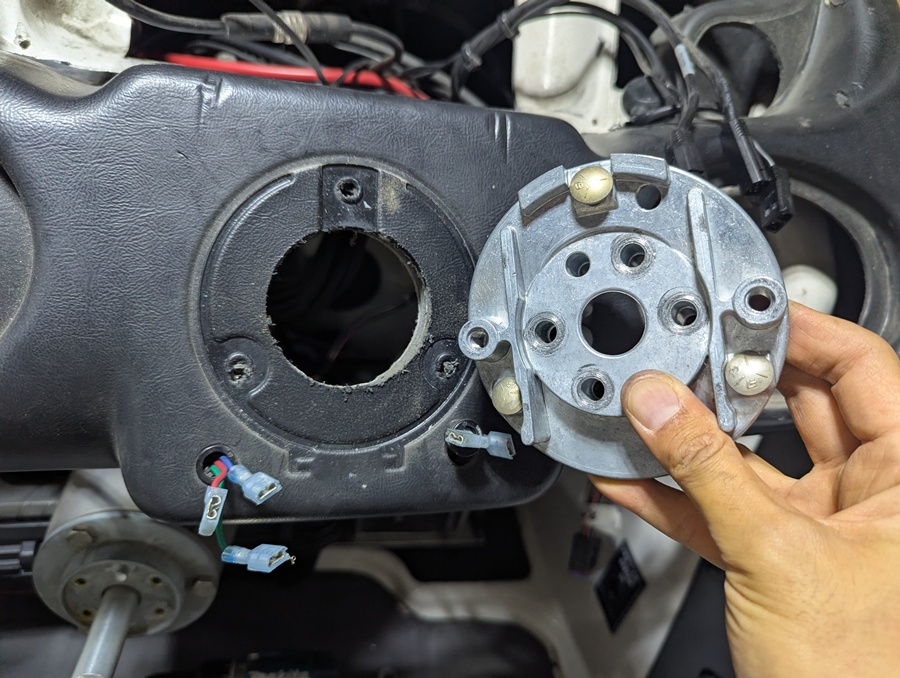
大変お疲れさまでした。
面倒な作業ですが、ステアリングアダプタの引き抜きさえクリアしてしまえばそこまで難しくは無いと思います。
Done!
It’s a painful work, but once you get past removing the steering adapter, the rest shouldn’t be too difficult.

※ぜひFacebookページへのいいね!& twitter・Instagramのフォローをよろしくお願いします。
関連記事


コメント
この記事へのトラックバックはありません。

この記事へのコメントはありません。